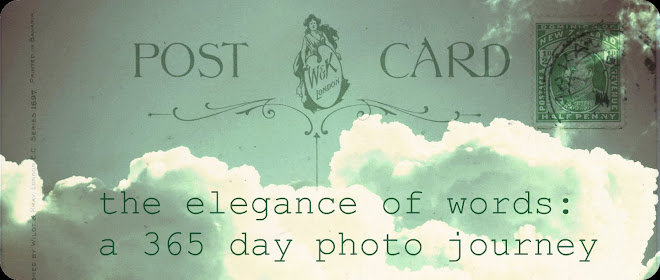
Several of you have asked about how I create the vintage kind of effect I get in some of my photos. The header for this blog is an example of 3 layers combined to create a specific vintage look. About a dozen of the almost-70 photos on this blog have been "texturized."
I don't use Photoshop or PSElements because my older computer doesn't like them, but you can certainly use those programs or other editing software to create the same effect. I use Picnik, which is available online in a free version but to do layers you need the premium version (a bargain at $24.95). As far as I know, you can't do this in Picasa -- if anyone has had success with it, I'd love to hear how you do it.
To create the layers, you need to use find a texture you like. There are tons of free textures on flickr for downloading -- just make sure you follow their guidelines for use. Then upload your photo and a texture to Picnik and drag one photo on top of another and play with the layering tool, curves, and other effects until you get it just right.
Click here to see a very short but sweet tutorial on layering with Picnik.
Careful now. You just might get addicted.
To see some really interesting texture work, check out the flickr group Textured Tresors. There's everything from the sublime to the ridiculous, with some really wonderful images in between. I'm new at it, so bear with me as I hone my skills.
skip to main |
skip to sidebar
This 365 day project features photos that include words (actual or implied), text, books,
writing, letters and numbers, signs, libraries, and.... well, you get the idea.
This 365 day project features photos that include words (actual or implied), text, books,
writing, letters and numbers, signs, libraries, and.... well, you get the idea.
about me
the words
$
100
16
1605
17
365
4 leaf clover
44
4th of July
50
5th grade
abandoned
abbreviations
abc
accident
accomplishments
actions
addiction
adventure
allergic
alphabet
amish
annoying
antenna
antiques
appliances
aquarium
art
arthur golden
artist
atomic bomb
auburn
autographs
autumn
awe
bakeries
baltimore
band-aids
banned
barber shop
barns
barnstable
barnstable village
bars
beach
beach grass
bears
beautiful
beauty
bed and breakfast
bees
benadryl
bench
berries
bethana butts
beyond megapixels
bi-plane
bible
bicycle
bike path
birdbath
birds
birdwatching
birthday
biting
black and white
blogs
blowing
blue
blur
blurry
boats
bokeh
books
boston.com
bowling
braille
brakes
branch
bread
breathe
brick
bridge
bronte
bubbles
buildings
bumper sticker
bunch services
bunny
burger queen
buzz
buzzard's bay
california
calm
can opener
cancer
cape cod
cape cod canal
card catalog
carfully
carmel
cars
carwash
catalog card
cats
caution
caves
cemeteries
centerville
chain
chair
chamber pot
charm city
chickens
chocolate
choice
chores
christmas
church
churches
claire
clarence white
climb
closed
clothesline
clouds
cod liver oil
coke
cold drinks
collected
color
common
comorants
confused
connections
content
converging lines
cookies
cooking
cookout
cool
cormorant
courthouse
cousins
crack
craigville
craigville beach
creativity
crisis
crooked house
crossing
crow
cupola
dad
dan
dandelion
days
dazed
dead end
dentists
desire
desk
dessert
determination
diary
ding dong
dinner
dirty clothes
dirty dishes
distance
do not drink
do not feed
dogs
dollhouses
dolls
domino sugar
doors
dorothy
dorothy loomis
driving
driving school
drunk
dump
dune buggy
dunes
dust
duxbury
Edie Vonnegut
edward gorey
eggs
egypt
electricity
ellis island
equipment
Euro Bobbles
evening
exit
eyes
fabulous
faces
faith
fall
fallon
falmouth
family
fans
farewell
farm
fashion
fashion show
fate
fears
feeling
feet
fence
fern
fields
fiery
filene's basement
filigree
fine
finish
fire
fire department
fish
fisherladies
fishnet stockings
flickr
flowers
flying
fog
followers
food
for sale
forefathers
found
four seas ice cream
fowling
frames
frankincense
free
freelove
friends
frost
fruit
funky chicks
funny bone
funny faces
furniture
gals
garden
gardens
general store
george washington bridge
ghostly
ghosts
gifts
ginger mint juleps
gingham bear
girl
giving
glasses
glorious
go forward
golden oldies
gone
good will
goodbye
graffiti
grandmother
grass
gravestones
gray
great blue heron
great point
grill
guestbook
guns
haiku
hair
halcyon farm
halloween
halls of justice
hallway
hammer time
handles
hands
handyman's special
hanes
hannah
happiness
happy
hardware
harvard
head
healing
health
hearts
hello
helmet
hi
hidden
hieroglyphics
high school
highway
hill
history
holly
honesty
honey
hope
horses
hot
housekeeping
houses
hudson river
humor
hungry
hyannis
i will
ice
ice cream
iced tea
iconic
infinitesimal
inner harbor
insanity
inscriptions
iron giant
itching
ivy
jail
jane eyre
jay
jeanne
jeffery. michael
joni mitchell
journey
joy
jump
kiss
kitchen sink
kmart
knives
Kurt Vonnegut
L
ladder
ladies
lady
lama
lamberts
lamp
landscaping
last word
late bloomer
laugh
laundry
lease
leaves
leeches
letters
librarians
libraries
library card
license plates
light
lightning
lights
limited
lindy
lions
litter
little miss muffet
lobelia
lock
look
looking
lori
loss
lost
lothrop bible
love
luck
lucy
lunch
luray
luray caverns
lutherville
luv czar
magic
mail
mailboxes
maine
mall
man
mantra
marlboro college
marry
marshes
mary dunn road
massachusetts
master
mattresses
max
me
medicine
memoirs of a geisha
men
mermaids
messages
metal
MG
millway
mirrors
mom
monuments
moon
moonlight
morning
mortal muses
mosquitoes
most wanted
motel
mothers day
mouse-eye view
mouth
movie theaters
mud
mug
mural
murkwood
museums
mustard
mustard seed ministries
myrrh
mystic lake
names
nap
national library week
natural
naughty
navigation
new year
new york
newspaper
nice
nick
night
no trespassing
no-crack
nook
nosebleed
not forgotten
november
nude
numbers
nye family
ocean
october
office
old
open
opium
orange
organic
ornaments
outhouses
pain d'avignon
paint
painting
pals
par-tee freeze
parking lot
parnassus
parson's sudsy ammonia
past
path
pay phones
peace
peas
pen pencil keyboard might sword
pets
photographer
photography
photos
picnic
picnik
pictures
piles
pilgrims
pilot
pine trees
pink
pirate
planter
plants
please
plymouth
poetry
poison ivy
poladroid
politics
pools
popple bottom
popsicles
postcard
postsecret
pot
potential
powder point
power
power lines
printing
private
private property
protection
providence
provincetown
queen
queene anne's lace
rabbits
raft
railroad bridge
rain
rainbow
rash
rats
RAW
read
reading
real life
redemption
redhead
reflections
relaxing
rescue
research
restrooms
richard's
rings
river
roads
robert frost
robert goddard
rock climbing
rock shop
rocket
rocks
roof
root canal
rough
route 6A
rules
runners
sailboats
sailing
sale
salt water taffy
sand
sandy neck
saturn
schedule
sculpture
scusset
seagulls
sealed
season
secrets
seeing
seguinland
self-improvement
self-portraits
self-preservation
sewing
sharp objects
shoes
shopping
shopping carts
show-off
significance
signs
silhouette
silos
sisyphus
sky
sleep
slicker
slow
smile
smiley
snow
snowman
soap
song
sound
special
sphinx
spider
spinach
splash
spoken wood
spring
sprinkler
squash
st. mary's church
star trek
state of mind
statue
steep
stephen wilkes
stickers
stones
stop
stories
storm
stormy
stove
stud
suicide
summer
sun
sunbathing
sunny
sunset
super boy
sushi
sweetness
swiss chard
symbolism
tagged
tail
tea
tears
teenagers
telephone poles
telephoto lens
temporary
texting
textures
thanks
thanksgiving
three fates
thyme
tiara
tibet
ticking
tigers
time
tomato
tools
touch
tower
toys
trapped
tree
trees
trellis
trick or treat
trout
truck
turkeys
umbrellas
underpass
underwater
underwear
universe
unscented
uphill
urgent
vacancy
vacation
vanderbilt mansion
video
village
vintage
virginia
visibility
volkswagen bug
voting
vulcans
wall
walt whitman
warning
wash
washing machine
watch
water
water tower
waterfowl
waterproof camera
wave
weather
weathervane
weeds
Welcome to the Monkey House
west barnstable
west virginia
what's up
wii
willow
wind
windows
windy
winter
wisdom
wishes
wishful thinking
wizard of oz
women
wood's hole
woods
woodworking
words
work
wounds
writing
wuthering heights
x
xoxo
you
yummy goods
zoo
all the days so far
-
▼
2010
(370)
-
▼
March
(33)
- day 92 of 365
- day 91 of 365
- day 90 of 365
- day 89 of 365
- day 88 of 365
- day 87 of 365
- day 86 of 365
- day 85 of 365
- day 84 of 365
- day 83 of 365
- day 82 of 365
- day 81 of 365
- day 80 of 365
- day 79 of 365
- day 78 of 365
- day 77 of 365
- day 76 of 365
- day 75 of 365
- day 74 of 365
- day 73 of 365
- day 72 of 365
- day 71 of 365
- day 70 of 365
- textures & layers
- day 69 of 365
- day 68 of 365
- day 67 of 365
- day 66 of 365
- day 65 of 365
- day 64 of 365
- come on over
- day 63 of 365
- day 62 of 365
-
▼
March
(33)
No comments:
Post a Comment